
This is part 2 of a multi-part article that covers these topics:
Part 2 – Samsung Galaxy Note 3’s camera test & recommendations for best Android camera apps
Samsung Galaxy Note 3’s camera test & recommendations for best Android camera apps
Okay, now we come to the initial reason for me to write this big review/tips & tricks: Galaxy Note 3’s camera.
Originally, because of the ongoing discussion about the Note 3’s camera at Android Central (namely how some people think it “sucks” and a huge disappointment compared to the camera on the Note 2 or other smartphones), I decided to write a detailed review/tutorial for all those who are having problems understanding how to use the Note 3’s camera properly. But since there were many other aspects about the Note 3 I wanted to share, it turned into the full-blown piece you are reading now.
First, let’s get some facts out of the way for those of you who have misconceptions about the Note 3’s camera.
1) The main problem most people are experiencing with Note 3’s camera is due to the Samsung default camera app. I did extensive testing and comparisons with other cameras and camera apps, and it’s Samsung’s default camera app that showed up as the culprit. The main problem is it applies noise-removal processing to the photos in l0w-light conditions automatically, and that processing is what kills the details in the photos and gives them the smeary oil painting look (and whether you like that impressionist look is a subjective matter). There is no option to turn the processing off, so you are stuck with what Samsung gives you, unless you use an app that does not force the processing on your photos.
2)Â Keep in mind that the image quality of low-light photos has two separate factors, and both needs addressing. The first factor is the image quality itself, which is solely a matter of hardware capability (such as sensor size, pixel density, lens quality, and software processing). The second factor is moving subjects that move and cause blurred photos, and this requires some photography knowledge and techniques. I will address both problems and show you how to deal with them or work around them.
3) Although there are issues causing the low-light photos to drop in detail, it is also true that some people have unrealistic expectations due to their lack of understanding of simple photography basics. They will point the camera at unreasonably dark scenes and expect it perform miracles, and that’s not really fair, as all small-sensored smartphone cameras will perform poorly in those situations, and the relative differences between their performances are not as great as most people make them out to be (or they simply don’t understand how to get better results with the Note 3, thus thinking the bad results they got are the best the Note 3 can achieve).
Let’s be objective for a moment here. A camera that actually “sucks” would never have even made it past the R&D department at the manufacturer. Samsung is a giant corporation and it knows what is at stake when they release a flagship product that needs to compete against other flagship products from rival companies in the marketplace. Companies don’t spend all that R&D money just to do a half-assed job that will cost them millions of dollars in lost profits. They have expert engineers working in their R&D department, and just because you don’t understand the decisions they made or how to use their product properly, does not mean their product “sucks.” The fact that the Note 3 can shoot 4K video is in and of itself a technological marvel that’s nothing short of revolutionary, and has sent a shockwave through the smartphone industry. Seriously, take a look at this screencapture from a 4K video shot by the Note 3 and tell me you’re not impressed. While 4K video is currently still ahead of its time in terms of typical consumer market, there are other handy uses for it, such as being able to extract high-resolution screencaptures from videos when needed to, or crop the the video during editing for more flexibility in composition after the fact.
Some of the reputable tech/photography/smartphone review/test sites have listed the Note 3’s camera (along with the S4, since they are pretty much the same camera) as one of the best on the market and compares very well against other flagship smartphone cameras. If professional reviewers that put all the flagship products through their paces with a wide range of testing scenarios came to that conclusion, and you for whatever reason think the Note 3’s camera “sucks,” then perhaps you need to try and be more objective or put some effort into learning how to use the Note 3 properly. You cannot expect it behave like the Note 2 or other smartphone cameras, because it has its own idiosyncrasies you need to learn.
BTW, here are a few links to professional tests that pit flagship smartphone cameras against each other:
http://www.youtube.com/watch?v=OMb-jXlkNwY
http://www.gsmarena.com/six_way_camera_shootout-review-998.php
4) The other issue is that Samsung has designed the camera app to prioritize highlight details over shadow details, so in scenes with contrasty lighting (such a photo showing both the dark interior of a room and the bright sunlit outdoors), the camera app will try to preserve highlight details by under-exposing, which will burn in the shadows, while some competitors chose to slightly over-expose to maximize shadow detail, but at the expense of blowing out the highlights. There is no right or wrong here–it’s simply a matter of preference. Some people place more importance on highlight details, while some place more importance on shadow details.
5) When using other camera apps that don’t apply destructive processing to the photos, the results can be noticeably better from the default camera app, depending on the scene you’re shooting. Although the noise level is higher when no processing is applied, the details are retained. Some of the better apps also allow more manual control when shooting, such as having expanded ISO settings, able to set the shutter speed, have visual meter for the camera shake detection, etc. These are the main factors in the differences you see between results from the default camera app and the third-party apps.
6) Just because you use one of the third-party camera apps I’m going to recommend later, does not mean they will act like silver bullets and allow you to perform stunning feats of photography in challenging situations. There is no substitute for knowledge and skill in any endeavor, and as much as makers of mainstream products try to make everything as idiot-proof as possible with automatic modes, we are still bound by the laws of physics. I will do my best to give you the most useful basics in photography techniques that are easy to utilize, and will make the most difference in helping you take better photos in general, even in low-lit scenes.
Now, let’s look at some test shot comparisons and establish a proper context for what’s to come. Since low-light shooting is the main problem with the Note 3, we’ll focus on that first.
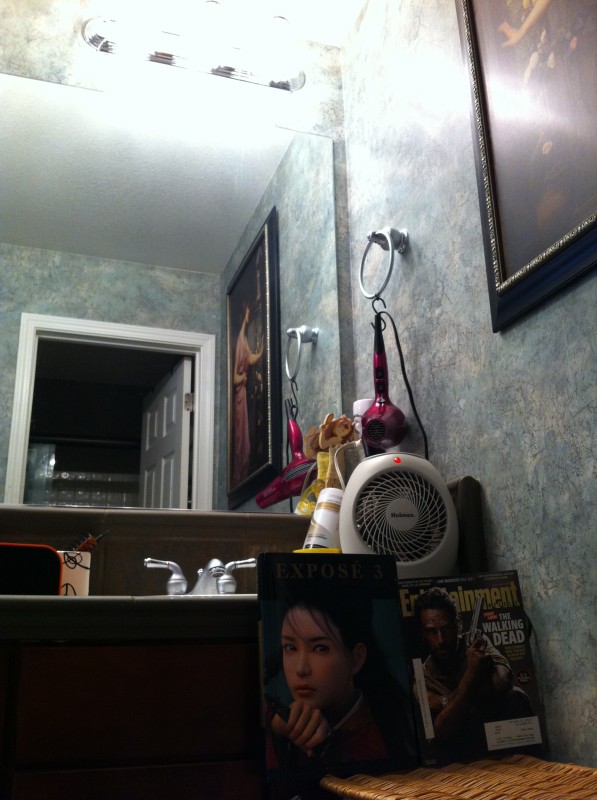
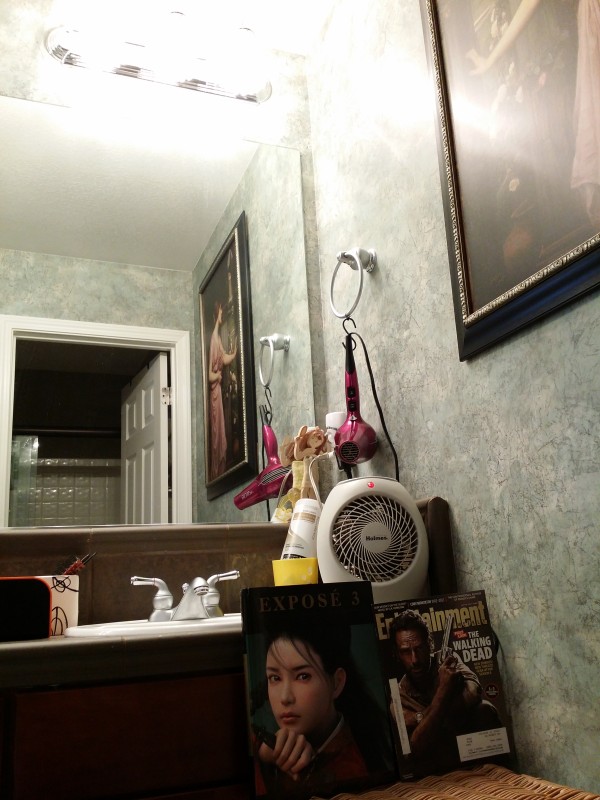
I purposely chose magazine and book covers as the subject because it’s better to have a stationary subject for testing, and I made sure the lighting is quite low, but still within reason. Most people who have no understanding of camera sensors or photography tend to post examples of “low-lit scenes” that are either actually too bright to be considered low-lit, or are unreasonably dark–so dark that they would challenge even professional cameras. It’s important to understand how to test a camera in the proper context according to the limitations of its specifications, otherwise you end up not pushing the camera hard enough, or pushing it far past its breaking point, thus not really finding out where the actual threshold is.
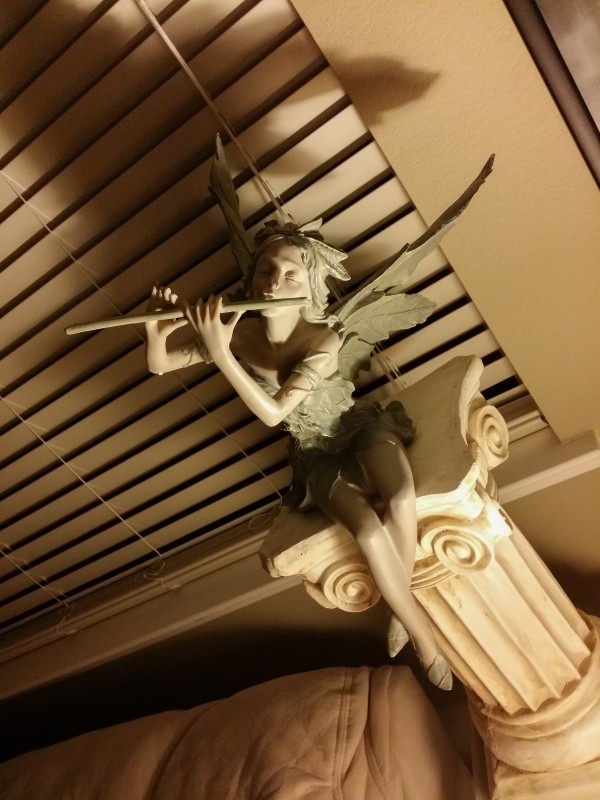
Here are a few overview photos of the environment I shot the test photos in, so you can see exactly how dark the actual environment was, thus giving the test a proper established context. The placement of the magazine and book are on the floor and circled in the photos. The photos were shot with the Canon 5D Mark III and visually adjusted to match the room’s actual brightness as much as possible (by walking to the spot I was standing when taking the photos, observing the scene, then walk to the computer to adjust the brightness of the photos to match):

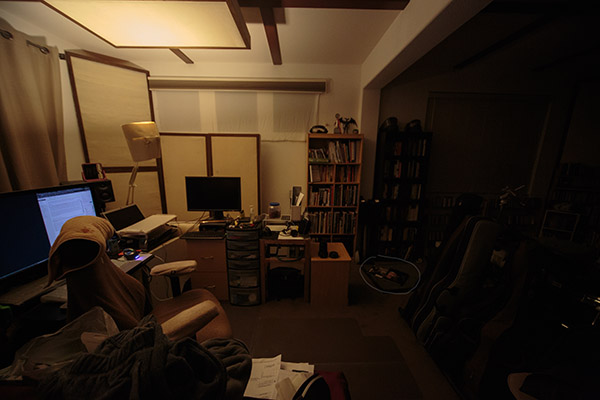
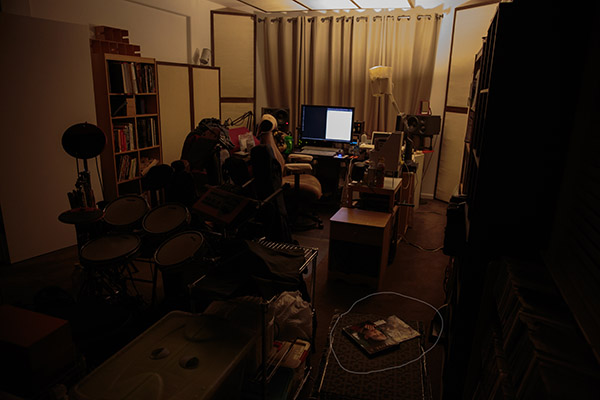
That level of darkness (the circled area where the magazine and book are on the ground) is pretty much the absolute breaking point for the Note 3’s camera sensor for acceptable amount of detail/noise for casual shooting (and if we’re talking serious shooting where image quality needs to be higher, then fugetaboutit–not gonna happen).
I have tried tests that are in even darker environments and the result was simply hideous and useless. So just know that if you are shooting in conditions darker than the scene shown above with your Note 3, then you need to stop and go grab a more capable camera, because you are misusing a tool that was never meant to be used in such conditions, and you should not blame the tool for failing when you misuse it. This is something you have to accept and work with, or else use a different camera for low-light situations and only use the Note 3 for brighter scenes.
As a point of reference, I have three other cameras to compare the Note 3 against, so we can have a more complete sense of where the Note 3 falls in the grand scheme of cameras, not just comparing apps on the Note 3 only, or against another smartphone. This also gives you an idea what grade of camera you need to get if you want a specific level of low-light performance.
The cameras used were simply the cameras I own and use. I’m not a regular tech reviewer so I never spend money to obtain gadgets strictly for testing/reviewing. I use what I have, and my writing these reviews/comparisons and sharing them with the public is simply my way of giving back to the web community, for having helped me so much in my shopping decisions.
The cameras I used were:
Canon 5D Mark III – This is my “serious photography” camera, when I need to shoot optimal image quality, with fastest focus/response time, and use professional grade lenses. It is a full-frame 36 x 24 mm sensor with 22.3 MP. The lens I used was the EF24-70mm f/2.8L II, which is my main go-to lens for 90% of all my shooting these days.
Panasonic Lumix LX5Â – This is the “travel/casual shooting” camera for our household. It is a higher-end compact camera with a 1/1.63″ (8.07 x 5.56 mm) sensor with 10.1 MP. When not traveling, it’s Elena’s main camera, so I don’t really use it in daily life anymore for casual shooting (I’ve been using the iPhone 4, and now the Note 3 for casual shooting).
Samsung Galaxy Note 3Â – The main subject of this article. Its sensor is 1/3.06″ with 13 MP. This is now my casual shooting camera.
Apple iPhone 4Â – This is the smartphone I switched to the Note 3 from and it has served me well in the last couple of years. Its sensor is 1/4″ with 5 MP. Its resolution is less than half of the Note 3 and the sensor is a bit smaller, and Apple did an great job with the software in the recent iOS 7 updates, squeezing so much out of the modestly spec’d hardware. Its low-light capability is particularly impressive, and is able to hold its own against the Note 3.
There are iPhone 5/5s vs. Note 3 tests on the web, so if you want to see how Apple’s latest compares to the Note 3, you can find comparison tests easily. In fact, here’s a link with carefully set up testing for you to analyze. It allows you to compare different smartphone cameras shooting the same test scene, and the Galaxy S4 is available, and it’s the same camera as the Galaxy Note 3.
Now, you might be wondering why I even bothered to do any testing if there are already professionally set up tests available on the web. The reason is simple: I needed to test for myself in environments I’m familiar with, subjects that matter to me, in situations that are common for me, and against cameras I’m already very familiar with, so I can put the Note 3’s performance and handling in contexts that are relevant to my daily life. Also, I needed to research the various Android camera apps and compare with with Samsung’s default camera app.
To establish the upper end of the quality, here’s a shot from Canon 5D Mark III during daytime, so you can see what the covers of the magazine and book are supposed to look like:
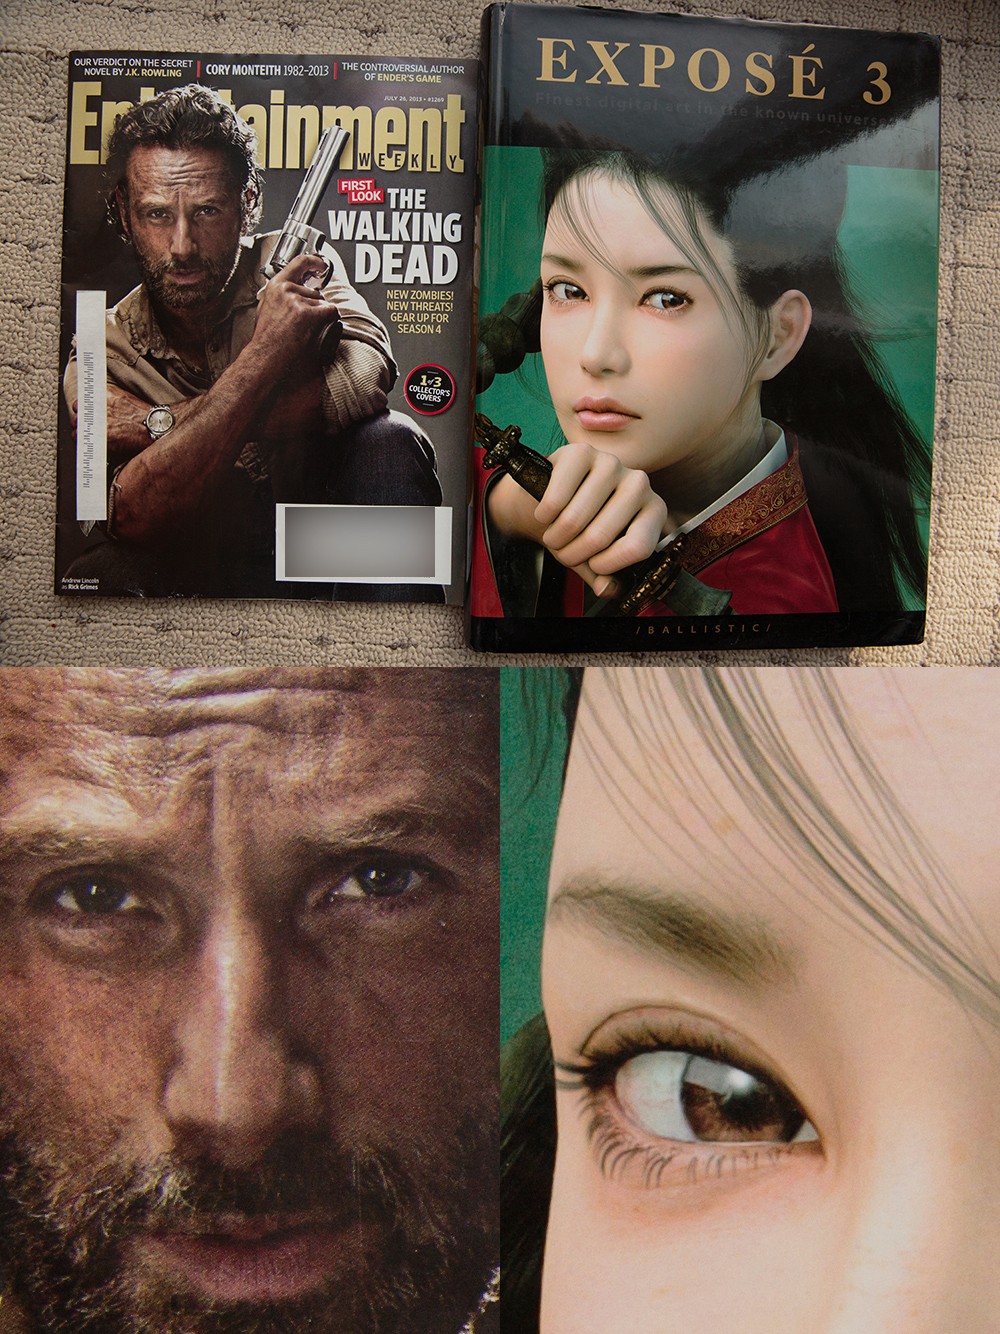
When looking at these photos, keep in mind that it’s extremely rare for anyone to need to show 100% original resolution to anyone–be it on the web or in print. I even debated whether to include the 100% crops at all, since I was worried they would mislead people into placing more importance on them than they should. What you really should be focusing on is the web resolution image shown in the top half, because that is what 99% of the people will be posting on the web, and even when they print out typical sized photos (5 x7 inches is common), they’ll still be looking at something similar to what they’d see at web resolution (because the physical size of the print is about the same as what you’d see on the computer screen). So unless you plan to make big prints (such as 20 inches or more), don’t worry about unnecessary “pixel-peeking.”
Here’s a shot of the same magazine and book covers, in low-light, placed at the circled spot on the floor shown in the previous photos (EF24-70mm f/2.8L II @ 31 mm, ISO 1600, f/2.8, 1/15):

(If you are a complete photography newbie and don’t know what any of the photography terms mean–ones like aperture, shutter speed, ISO, etc, you might want to skip to the “Core concepts of photography’s technical aspect“ section of this article first and get a quick overview, and then come back to this spot to read the rest.)
The low-light shot from the 5D Mark III establishes what a professional DSLR is capable of in dimly lit environments. The camera setting was very specific–I set it to match the typical settings that current smartphones are usually limited to in low-light situations (set by the companies that make them), which is usually ISO 1000~1600 at the highest sensitivity, and 1/10~1/15th of a second at the slowest shutter speed, and whatever widest aperture that the lens is (these days it’s around f/2.0~f/2.2). This is pretty much today’s cutting-edge low-light performance, and it is achieved with a camera system (body and lens) that costs around $5,000. If you expect results better than this with any smartphone on the market currently, then you need to recalibrate your expectations, because what you’re asking for is science-fiction alien technology that does not exist currently.
The next set of photos were taken with the Panasonic Lumix LX5, which represents what a higher-end compact camera with a small sensor can achieve (keep in mind that these contain processing using Panasonic’s own noise-removal algorithm, applied automatically when shooting in JPEG mode. If I had shot in RAW mode, they’d have been a lot noiser):

The setting for this photo is 28mm (35mm equivalent), F/2.2, ISO 1600, 1/15, to emulate the setting smartphone camera apps are typically limited to during low-light. The Lumix LX5’s sensor is a little larger than the Note 3’s camera sensor, and if you want to see how the sensor sizes compare visually, take a look at this comparison chart (it’s customizable, so you can compare any cameras you want).
When I allowed the LX5 to choose what it thinks is the best setting (using its iA mode, which is its fully automatic, idio-proof mode), it gave me this (the ISO was dropped down to 800, the shutter speed slowed down to 1/4, and the image-stabilization activated):

It’s obvious the LX5’s iA mode tried to raise the brightness of the image by slowing down the shutter speed to 1/4Â (because its exposure meter deemed the scene’s average brightness to be too dark), which would normally be way too slow for handheld shooting due to camera shake, but it does this because of the available image-stabilization.
Next, let’s look at what the iPhone 4 is capable of:

Just like all other cameras that are programmed for automatic shooting, the iPhone will choose a setting based on how low of an ISO setting it can get away with at 1/15 shutter speed (which is often the slowest shutter speed manufacturers program into their camera’s automatic mode), and it will continue to raise the ISO sensitivity level until the ideal exposure level is achieved, or the ISO levels are maxed out completely.
I have to say, for a camera with a tiny sensor, Apple did a really good job making the noise pattern fairly appealing (compared to a lot of other noise patterns I’ve seen. For example, the Note 3’s noise pattern is more splotchy), and the overall fidelity good enough for typical web posting (which is what most people do anyway). It wasn’t that long ago when cameras produced hideous messes at ISO 1000, so we’ve definitely come a long way, and the iPhone 4 is from three product release cycles ago too.
Now we get to the Note 3. Let’s look at what the default Samsung camera app gives us. First, without the Smart Stabilization:

Just like all other cameras, Samsung’s camera app also raises the ISO as high as possible, and drops the shutter speed to what it deems the slowest it wants to go, so we end up with f/2.2, ISO 1000, 1/15. Just so you know, there is a camera app that push the ISO to 1600 and allow you to set much slower shutter speeds, and I’ll get to it later.
And this is with the Smart Stabilization turned on:

We can see clearly that with or without the Smart Stabilization, Samsung’s camera app is applying heavy-handed noise-removal that looks smeary and lacking detail, and this is exactly what some people are complaining about. This destructive processing cannot be turned off, and whenever you shoot in conditions the app deems too dark, it will apply this processing (and you can tell when it’s going to happen too, because the shaking hand icon for the Smart Stabilization will become smaller).
If we judge the Note 3’s camera solely on the the default Samsung camera app, then it’s easy to see why some people think the Note 3’s camera “sucks.” But that is not the whole truth. Let’s look at what the Note 3’s camera is really capable of when it is using third-party camera apps that don’t force destructive noise-removal processing on your low-light photos.
This one is from A Better Camera (there is no EXIF information because the app does not record any).

This is pretty much what you can get out of the Note 3’s camera without any unwanted processing. Look at how a lot of the textural and finer details are now restored. It is a marked improvement over the processed results from Samsung’s default camera app.
There’s a mode in A Better Camera called Night Mode (which used to be a standalone app called Night Camera), and if you want to see really hideous processing, this is it:

This is far worse than the Samsung camera app’s processing. Raising the exposure level isn’t bad in general, but it also smoothes out all the noise and thus make everything look airbrushed, as well as lower the color saturation too, and when you have all three going on, it makes the photos make too artificial. IMO, you should avoid the night mode (or Night Camera) unless you specifically want this particular look for your photos.
The other apps I’ve tested all allow unprocessed photos, and it’s kind of pointless to show them all because they all look quite similar to the unprocessed one from A Better Camera. But I’ll show a couple just to demonstrate that they look about the same.
Here’s one from Camera FV-5:

CameraFV-5 allows slower shutter speed and higher ISO level than Samsung’s default camera app, able to go down to 1/10 and up to ISO 1600.
Here’s one from CameraZoom FX:

I need to clarify something here. When I say that some apps don’t apply heavy-handed processing to the photos, this is only partially true, because obviously there is still at least color-noise removal happening somewhere, since all these results are clearly free of color-noise. My guess is that all the camera app developers are either using the same base image processing algorithm native to the Android OS, or the processing is done at the hardware level and the app developers really aren’t applying any processing at all in their apps.
With that said, we can see that the results from these third-party apps are pretty much the same, which means you can get unprocessed low-light photos from any of them (as long as you avoid any of the shooting modes that add processing you don’t want). But they aren’t the same in terms of features or handling, so I’m going to make some recommendations later, based on my experience testing all these camera apps.
Out of curiosity, I took the same photo into Lightroom 5 to see what I can achieve with its Noise Reduction tool (without going overboard and causing that smeary oil painting/airbrushed look):

I tried not to be heavy-handed, only taming the overall noise grain in the full image (remember, the 100% zoomed-in level is really not that relevant in most situations), and while it took away a bit of textural detail (such as in the carpet fiber), the overall level of detail and naturalness is still far superior to Samsung’s default camera app’s processing, or the hideous processing from apps like A Better Camera/Night Camera. I did not try to raise the exposure level because the level of darkness is an accurate representation of the actual scene (though if I wanted to make it brighter, I could have).
Now, let’s look at the dynamic range.
Here’s how the 5D Mark IIIÂ handled a scene with high dynamic range (very bright and very dark areas):
With a large sensor, a professional DSLR is able to capture a wider dynamic range than cameras with much smaller sensors. The three lights on top all retain enough detail so we can see their shapes clearly, while the book and magazine covers have proper amount of exposure that’s accurate to the scene.
BTW, the human eye’s dynamic range is about 1-14 f-stops, while a camera with small sensor (smartphones, most compact cameras) have about 5-7 stops. Cameras with larger sensors (such as DSLR’s or high-end compacts) have about 8-11 stops.
Here’s how the iPhone 4 handled the same scene:
See how all highlight details are completely blown out at the top, becoming amorphous blobs of white pixels, and how the magazine and book covers are quite dark? This is a limitation of the camera sensor’s dynamic range.
Here’s the Note 3 shooting the same scene:
The Note 3 has similar dynamic range as the iPhone 4, due to also having a small sensor. The overall exposure is slightly brighter (around 1/4 stop), that’s why the covers are a bit brighter and the lights at top are blown out a little more.
When shooting with any camera that has a small sensor, it’s important to be aware of its limitations in dynamic range, so you can choose to prioritize either the highlight details or the shadow details, depending on what you’re shooting. I’m going to revisit the subject of dynamic range later in the photography tips in part 3, in the context of proper exposure and metering modes. For now, lets move on to what the Note 3 can do in typical everyday situations.
Some non-test shots with the Note 3
Often, when people focus too much on testing photography gear, they lose sight of what’s really important, and that is taking photos with meaningful purpose in their lives. Your loved ones, your precious memories, documenting important events, gathering information, exploring your surroundings, artistic expression, professional image-making–these are all the reasons why we should care about photography, and it’s important to remember that all testing of gear needs to be in the context of serving that purpose. So in order to balance out the test images above, I’ll share the kind of photos I usually take with the Note 3 in my daily life, and as you’ll see, its camera really is pretty good for what it is–a smartphone camera with a tiny sensor crammed with high pixel density. I don’t get hideous photos like a lot of people because I know where the camera’s threshold is, and I don’t force it to do things it was not designed to do. Treat your gear with understanding, and it will serve you well.
(Since these aren’t test photos, they have gone through typical post-processing steps to achieve the best results such as brightness, contrast and color adjustments, noise-removal, cropping, etc.)
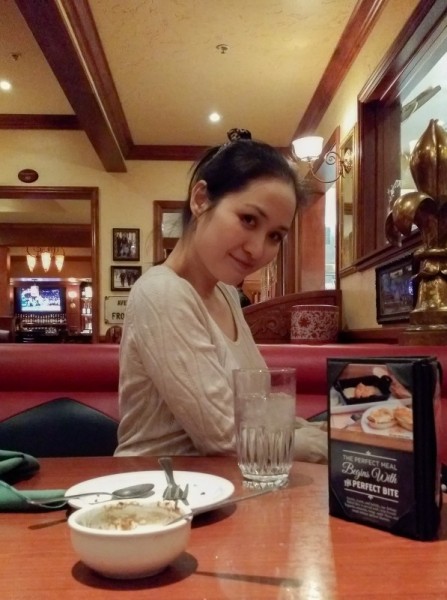
Generally, I don’t really use the Note 3 to take photos that are meant to be “photography,” since that’s what the 5D Mark III is for. But there are times when the Note 3 is the only camera I have with me, and I see something I want to take a photo of, such as this shot at a restaurant:
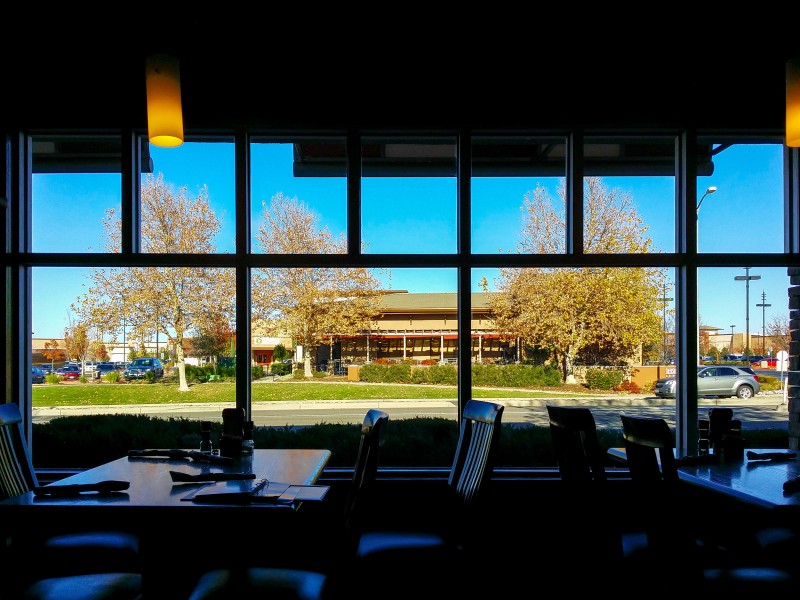
The truth is, I don’t think the shot would have been much better if I had taken it with the 5D Mark III. When a shot is within the capabilities of a camera to resolve the details and achieve desired exposure, the rest relies on the artistic decisions of the photographer, and is no longer about the camera itself.
Sometimes, the right tool for the job isn’t a high-end device. For example, when we got some unexpected frost one morning, I tried to take some photos with the Canon 5D Mark III, but they didn’t turn out the way I wanted, while the shots I took with the Note 3 were a lot better, due to the vast depth-of-field of the smaller sensor. This is a great example of looking at device’s inherent characteristics as glass half full or half empty. In this case, it was full, while the 5D Mark III’s superiority didn’t really matter much in this context.
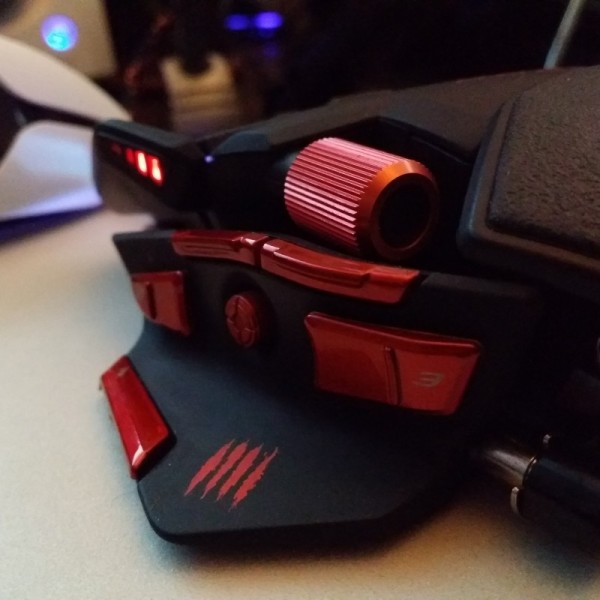
A couple random shots during my assessment of the Note 3’s camera:
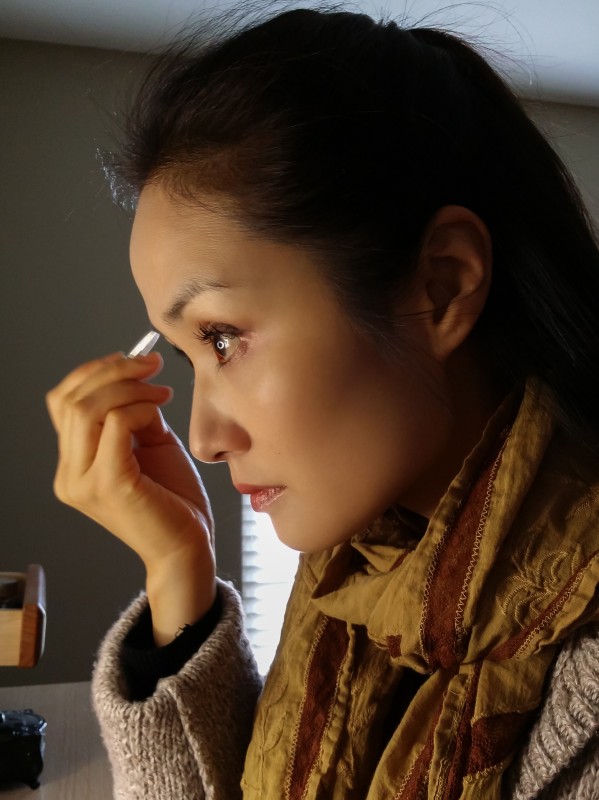
Those of you who are familiar with the Kitty Cat Diary series on my website’s photography section knows that the subject I shoot more than anything else in the world is my wife, Elena (nicknamed “Mau-Mi,” in Chinese, which means Kitty Cat). Since I tend to use smartphone cameras only for casual shooting, I end up shooting lots of photos of Kitty Cat going about her day in various situations:


When you use a camera to shoot scenes that are within its comfort zone, you get much better photos. For casual shooting, the Note 3 is really not that bad, and to me, it’s certainly worth the trade-off to not have to carry a dedicated camera everywhere. One of the most important sayings in photography is, “The best camera is the one you have with you,” and the Note 3 is always with me no matter where I go, because it is truly a “life companion device.”
Sure, I can get much better quality photos and superior controls if I carried a high-end compact camera with a larger sensor, while still enjoying the portability of the compact size, but as enticing as that sounds, it is one more device I have to carry, and for everyday life, that’s just one device too many. So really, the Note 3 is fine for casual shooting, and I only bring out the professional DSLR when I’m doing planned or mission-critical shoots.
I do think that the current trend of putting large sensors in high-end compact cameras is very exciting, and I would likely get one for dedicated travel shooting so I don’t have to carry a DSLR for the superior quality. But currently compact cameras with large sensors are not quite there yet in terms of performance speed and flexibility, so for now, it’s going to be just the Note 3 and the 5D Mark III.
Although as a camera, the Note 3 is just another consumer grade point & shoot, it’s one of the better cameras you can find on a flagship smartphone. Until we advance further technologically, it’ll have to do, and I’m okay with that.
Android camera app recommendations
I have tested all the camera apps for Android that seemed like they’re worth testing. I filtered out all the useless “fun” camera apps because they are missing some of the most important features a truly useful camera apps should have, focusing on gimmicks such as funny face distortions, garish looking filter effects and picture frames, and other silly stuff that doesn’t actually help you take better photos. Once I filtered out all the gimmicky apps, I wasn’t left with much. Among the ones I tested were apps like  ProCapture, Snap Camera HDR, Camera FV-5, CameraZoom FX, A Better Camera/Night Camera, Camera360 Ultimate, Cymera, Zoom Camera, etc.
Although some people like ProCapture and Snap Camera HDR, I found problems with both that are deal breakers for me. ProCapture doesn’t even have ISO control, which is one of the most important controls in photography. I don’t even know how an app can call itself “Pro” anything if it lacks the most basic and critical features. Snap Camera HDR sounds like a good idea on paper, but the so-called “clutter-free” GUI is the worst thing you can have for serious photography, because the number one rule in photography gear design is to put the most often-used controls right there in front of you, accessible at all times, without any additional digging in menus. In GUI design for real-time operation of any gear, even one extra tap is too much when split second decisions have to be made.
Generally, it’s not a good idea to have a bunch of different camera apps, as that makes your shooting decisions a lot more complex than need to be. Ideally, you want to narrow it down to as few as possible, with each serving an important function that other apps just can’t handle. Here are the camera apps that I think are currently the best on Android:
Camera FV-5 – This is hands down the best app on Android currently for still photos. The GUI is intuitive and laid out like a proper set of camera control. The ergonomic GUI layout lets you change important settings such as ISO and exposure compensation very quickly, as opposed to having to dig in a menu somewhere or require extra taps to bring up the controls.
One of the most unique features of Camera FV-5 is the control for shutter speed, and for this reason alone it’s worth it to get the app, because you’re not going to find it in other apps (though be aware that when you drop the shutter speed past a certain threshold, the app will limit you to smaller resolution).
Another great feature Camera FV-5 has is the ability to raise the ISO to 1600, which is beyond the ISO 1000 limitation of the default Samsung camera app. This combined with the shutter speed control gives you a lot more flexibility in what you can do with the Note 3’s camera.
Slow Sync flash is also a very useful feature that Camera FV-5 has. It allows you to keep the shutter open longer so more ambient light is collected for a natural look, but the flash still fires and freezes/illuminates your subject.
The one thing I don’t like about the app is how you can’t touch-shoot and must use either the user-assigned hardware button or the on-screen shutter button. I much prefer being able to touch-shoot on any spot on the screen, as it shortens the time between composing the shot and actually taking the photo. I hope they add this feature in a future update.
Camera FV-5 has a fairly complete user’s manual available (which is rare, since most camera apps don’t have any, or just have a very basic FAQ page), and being in PDF format, you can keep it on your device and reference it when you need to.
CameraZoom FX – This is a good app to supplement Camera FV-5, but on its own, it lacks some of the important features a more complete camera app should have, or have GUI layout problems. For example, the ISO setting can only be accessed from within a menu, and it is missing an exposure compensation control.
The must-have feature for this app is the Stable Shot indicator, which displays how much camera shake there is in a real-time updated visual meter, and it will not take the shot until the amount of camera shake is low enough (and you can customize how sensitive it is). For low-light shots with really slow shutter speed, the Stable Shot indicator can be the difference between a blurred shot and a clear one (assuming your subject is fairly still), and it’s the main reason I use this app.
I also use this app for typical casual shooting where I don’t have to think about the settings (I just set the ISO to auto and only need to adjust the exposure compensation as needed), and because the app does not apply destructive processing the photos, it’s better than using the Samsung default camera app. You can certainly use Camera FV-5 for casual shooting too, but its lack of touch-shooting makes it less intuitive for that purpose.
Samsung default camera app – Although the default camera app from Samsung has caused a lot of the negative reactions among Note 3 users due to the heavy-handed processing to the photos in low-light situations, it still has some great features you’re not going to get elsewhere, such as the various unique camera modes Samsung has provided, or the 4K resolution video (whether that is useful to you is subjective). My advice is to use Camera FV-5 for more critical shooting, CameraZoom FX for more casual shooting, and the Samsung default camera app for video and the esoteric shooting modes.
Here is a nice link that lists some great tips specific to Samsung’s default camera app.
I don’t do any photo-editing on mobile devices, as I prefer the much more robust features, processing power, and screen real estate of computers. My digital darkroom workflow consists of Adobe Lightroom and Photoshop, and although I have used other software in the past, none comes close to this combination. But I did research photo editing apps and tested a few, just so that if one day I’m out and about and must take photos of something and send it to someone, I have the tools readily available. Here are a few recommendations:
Snapseed – This is probably the most powerful photo-editing app for Android, since it is based on Nik Software‘s technology for its highly respected photo-editing plugins (now owned by Google).
Aviary Photo Editor – A very popular photo-editor that’s simpler than Snapseed, and probably enough for most people who don’t need the more powerful features of Snapseed.
Pixlr Express – Photo Editing – Another good photo editor, from Autodesk. The Sketchbook for Galaxy app that comes with the Note 3 is also from Autodesk.
I’m not recommending Photoshop Touch, because as a rule, I don’t pay for apps without being able to try it first, and Adobe chose to not provide a trial/free version.
If you want to learn how to take better photos–not just with the Note 3, but with all cameras, here’s part 3:
Here’s part 1, in case you missed it:

Just wanted to say thanks for the time and effort put into this.
Cheers
Merely skimmed the article this morning, but I will surely be reading it in complete detail as soon as I have the chance. Thanks for taking the time to put this together. As someone who takes lots of photos with my Note 3, this article will certainly come in handy. Thank you again.
Thank you for putting this GREAT 3 part resource blog together.
It doesn’t just give us good tips for getting more out of
our G Note3, but as a whole it is very interesting. Will definitely follow.
Thank you for this very interesting and useful article ! And impressive the effort you put in !
Thanks for a very comprehensive review and share your personal perspective toward point and shoot photography. Excellent article.
Thank you for this informative, well-written article. I just upgraded from the S3 to the Note 3 and I am exploring the camera. So many layers to get to the things you need! I will have to try the apps you recommended. Thanks again for the effort to put this together.
Thank you so much for putting in the time to do this. It’s great to see someone so dedicated into their craft on the Note 3!
Thanks for the article.
I take lots of flower pictures and the Note 3 (at least with the stock app) is unable to capture brightly colored roses without distortion, even in good lighting. This is irritating me a lot as with all the tinkering Ive done, there is no fix. It begs me to ask did Samsung even test this camera on taking pictures of red or pink roses? Even on the live view, these roses look like they are under an oil painting effect filter. My iPhone 5 doesnt have this issue at all. But on the flipside, the Note 3 captures white flowers really well in good detail which the iPhone 5 has trouble doing.
It’s probably the automatic color enhancement Samsung’s native camera apps adds to the photos. You might want to try one of the alternative camera apps I recommended and do a test comparison with the Samsung camera app. Also, there’s the option to do some post-processing with an image editing app and reverse the processing Samsung added to your photos.
WOW Thanks a lot for sharing your knowledge and experience. I bought my Note 3 almost a month back and was terribly shocked with the poor photo quality under certain conditions. I installed many other apps just like you did and ended up with many other apps like Better Camera etc. The main reason why got really upset with the camera was with the experience I had with my previous phone Sony Ericson Neo. It’s 8MP camera was so easy to use and the picture quality was so good that one of my friends who was doing research for his PhD in Biology he kept inviting me for field trips just because of my camera phone.I wanted an upgrade and here I am with my Note 3 with a big disappointment. It was more like a slight upgrade as I can only see better quality in color and that’s it.
Great article, going straight to my bookmarks.
I’ve recently become a bit upset with the results I was getting on my Note 3, so I decided to do some digging. I figured the issue I was seeing had to be some hidden processing that couldn’t be turned off, so I’ll definitely look into the apps you’ve recommended.
I’m wondering though if you’ve had a chance to test out the Camera Awesome app that finally made it’s way to Android after only being on iOS forever. I’m not sure how in-depth it is, but it’s gotten great reviews it seems. I’m also wondering how the newly released Google Camera app stacks up if you’ve looked into it. I can’t test it out yet since I’m on Verizon and the app requires KitKat, but it supposedly has some nice features. It even does well enough in distinguishing depth that the dual cameras on the new HTC One M8 is nothing to write home about from what I’ve read in M8 reviews that use this app as well while testing. I’d be very interested to hear what you think about these two if you’ve had the chance to test them yet or do look into them.
Once you get rid of the Samsung native camera app’s post-processing, all the other apps that don’t do the forced post-processing will take exactly the same photos in terms of actual image quality. The only real differences among them becomes mainly the GUI, so if a new app has specific GUI design elements that other apps don’t have, and you happen to be needing that specific feature, then go for it (but make sure it isn’t missing features you do love on the apps you’re already using, otherwise it’d be just a trade-off and not actually gaining a new feature).
Personally, after using the Note 3’s camera for the last few months in various situations, I decided current smartphone camera performance just isn’t up to par for my needs in terms of responsiveness and autofocusing speed/accuracy. I shoot Elena more than any other subject and I need to be able to track her movements accurately in various situations, and a smartphone just can’t do that. This is why I’m now about to get a high-end compact camera with a large sensor and faster autofocus as my daily walkaround camera (probably the Canon G1X Mark II or the Sony RX100 Mark II). The 5D Mark III will become my “serious shoots only” camera.
Installed the Camera FV-5 on my Samsung Note 3 and the flash made such a loud noise when going off….that along with it didn’t seem to improve a ‘still’ shot with flash in low light….there was still a colored hue to the picture that I don’t know where it is coming from. So I uninstalled the camera app. The camera on my old phone…HTC One was far superior.
Thanks so much for taking the time to write this article. It was VERY useful
Hi. You did a very great job not just by publishing the helpful tips, but also by assisting us go over Samsung note 3.
I am not a tech savvy, but I have learned so many things. 🙂
Hi, I use Samsung Note 3 Neo. The default app’s metering modes – matrix, center weighted average & spot – all work as the center weighted average. I think this is a bug in the software. Further, pictures come as dark unless the exposure compensation is scaled upwards.
With Camera FV-5, is there a setting that you adjust to get non-processed (or minimally processed) photographs, or does it do that by default?
Thanks.
It should be unprocessed by default, and you shouldn’t have to change any settings.
Any camera these days should be able to handle a good lighting shot or a still life shot. But, a decent camera in real time should be able to get a group shot or shot of two people posing in full stream incandescent settings with less blur problems. Not impressed after a week. And…it may be user problems, but if so, every photo I am in…I will be blurry because a third party user just “can’t figure out your crazy phone”. I love my note pen…and a lot of us are artistic people buying this phone, so the camera competitive edge has got to keep up. There’s a reason why, in the first week so many of us are Googling “best camera replacement app for Note 3”. Lack of image stabilization at this point in the game is just horrific and standing there 5 seconds for the fake processing is truly an awful camera experience. How does these things get past marketing? Very sad about an otherwise great Christmas gift. 🙁
Thank you so much for this practical, well explained and written article. I was really disappointed in the camera and also did not believe Samsung released a bogus product. I appreciated the additional background processing from Samsung but for folks who know what they are doing, there should be a option to switch this off. I am now checking out your recommendations to see which fits my needs best. 5 Star article!!!
Just the amount of effort is enough to thank you for this article! It’s very well constructed and considerate with the audience. Thank you!
Cannot thank you enough for taking the time to write this article. Extremely thorough, unbiased, relevant, the scientific method. The effort does not go unappreciated!